Acrobat PDF Accessibility
Table of Contents
- Remediate a PDF in Adobe Acrobat Pro
- Open the “Reading Order” tool in your accessibility toolkit.
- Document
- Alternative Text
- Tables
- Headings
Remediate a PDF in Adobe Acrobat Pro
First, open your PDF and run the Accessibility Checker.
This will run what is called an “automated” accessibility check. It is a fantastic way to catch a lot of accessibility issues, but it doesn’t find or correct all issues.
-
- Select “Tools” in the upper left-hand toolbar.
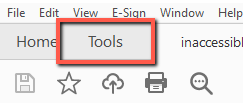
- Under the “Protect & Standardize” bar, select “Add” under the accessibility tool.
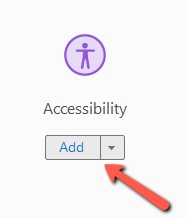
- This will add your accessibility tools to your toolkit on the right-hand side of your screen.
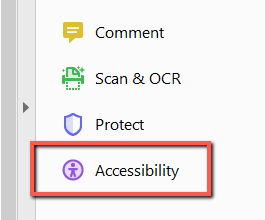
- Now, select “Accessibility Check” within the accessibility toolkit.
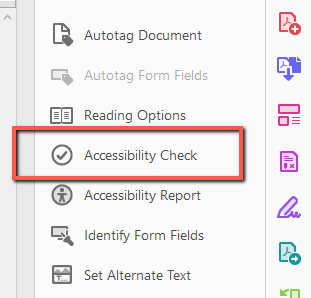
- The Accessibility Checker Options panel will appear. Select “Start Checking”.
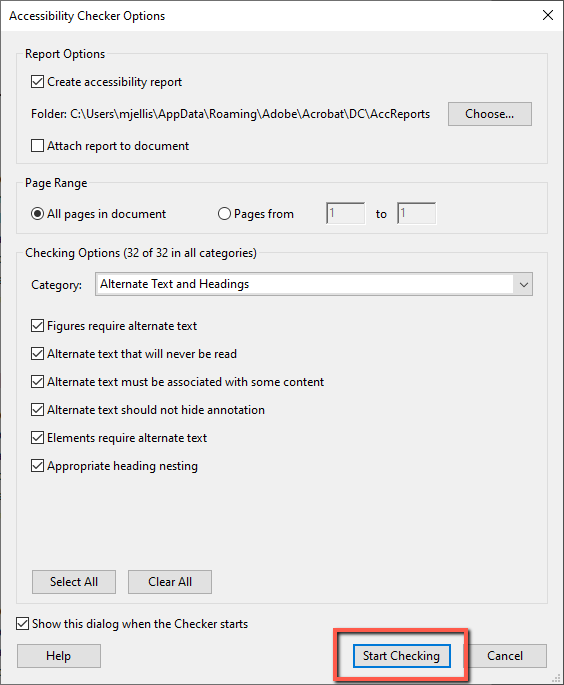
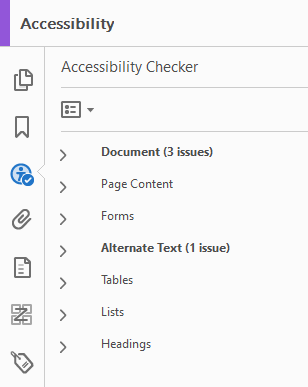
This tool will scan your document and report any accessibility errors it finds. - Any accessibility errors found will appear in a panel on the left-hand side of the screen. At this point, you can further investigate what you need to do to correct these errors.
- Select “Tools” in the upper left-hand toolbar.
In this example, there are three Document accessibility issues and one Alternative Text accessibility issue found. We can learn more about what needs to be corrected by expanding these options within our Accessibility Checker.
Open the “Reading Order” tool in your accessibility toolkit.
The Reading Order tool is the key to excellent PDF remediation. This will help you add the invisible “tags” needed on your PDF to ensure screen readers can understand the content correctly.
What are “tags”?
Tags are digital labels used to organize content in a PDF. These labels give information to assistive technologies that allow the documents to be used (or used more effectively). Tags are added to several distinct parts of a document and build out of the structure of the information. These digital labels are added to paragraphs, tables, figures, and headings, to name a few.
Why are tags important?
Tags are the only reason PDF documents have internal structure. This structure is the only way that assistive technology users can access the information in a PDF document. Adding tags – and ensuring those tags are correct and in a logical order – will ensure that your document is available to everyone, regardless of how the information is accessed.
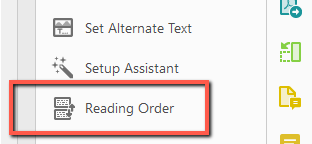
To open the Reading Order tool, select “Reading Order” in the list of tools available in your accessibility tab. This is found on the right-hand side of your screen.
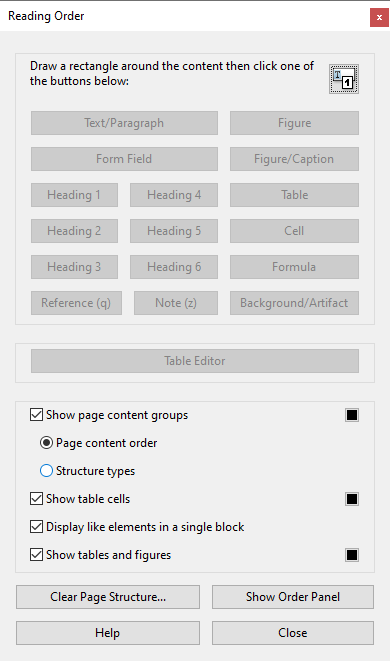
This will open the Reading Order pane, shown below.
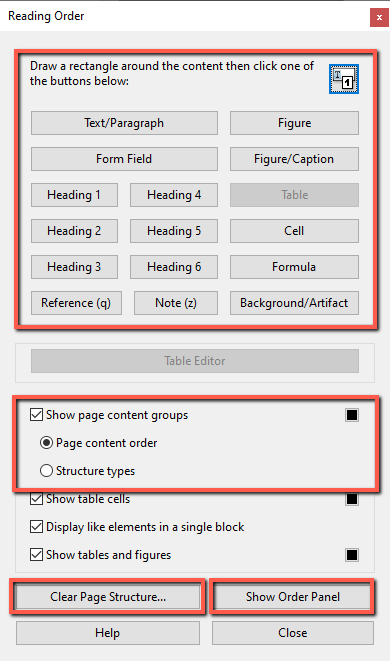
What is a Reading Order Pane?
The top tools are used to tag or re-tag a feature. For example, if you need to designate something as a figure when tagged as a paragraph, you can correct that using these tools.
You can have one of two page content groups displayed at once, and you can toggle between them. Page Content Order will display the reading order of your tagged document, while the Structure Type will display what tags have been used for different artifacts.
The Show Order Panel button will open up the Order Panel toolkit. In this tool area, you can correct the reading order of your document. Sometimes a PDF has been tagged automatically or needs to be re-tagged from scratch. If it is easier to correct tags from scratch, you can select Clear Page Structure to remove all tags on the page you are currently viewing.
Document
Logical Reading Order – Needs manual check
Every time you run the Accessibility Checker, your document will get flagged for Logical Reading Order. This is because Adobe has no way of knowing if your document is in a logical reading order– you have to check for yourself! Thankfully, it is easy to do.
- Open your “Reading Order” Tool.
- Select “Page content order” under “Show page content group”. This will toggle your interface to display the reading order of your page.
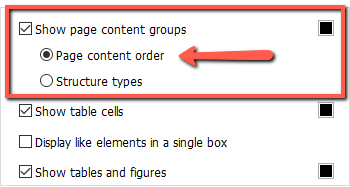
- The figure labeled with a 1 will be the first item read with a screen reader. The second item read will have a 2 label. This will continue for the duration of the page you are viewing.
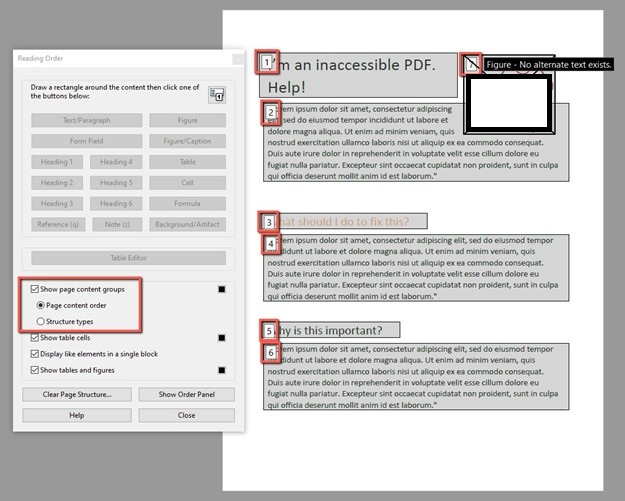
Note: Each document page will have its own reading order. Each page will need this manual check.
Primary Language – Failed
By adding a language attribute to your document, you are ensuring that screen readers have all the information needed to understand that document correctly. Adding a default language is also extremely easy to do in Adobe.
- Select the “Primary Language – Failed” notification in your Accessibility Checker pane.
- Select “Fix” in the menu that appears.
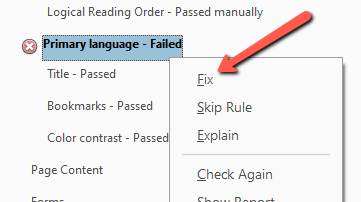
- The “Set Reading Language” pane will appear. Use the drop-down menu to select your document’s language. This drop-down menu will most likely default to English.
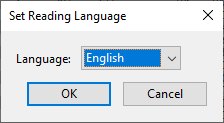
- Select “OK” to save your choice
Title – Failed
Titles are used to label your document and are very important for screen reader users to know what files they are opening.
Note: This information is different from the name you have used for the saved file.
- Right-click the “Title – Failed” notification in your Accessibility Checker pane.
- Select “Fix” in the menu that appears.
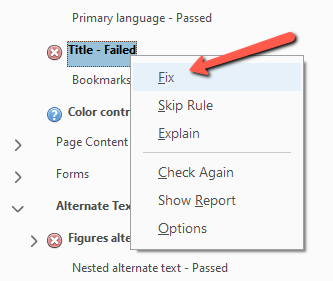
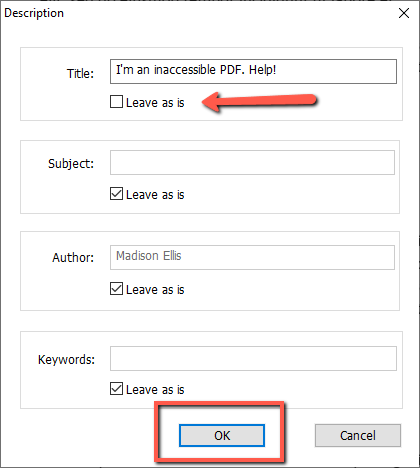
- The “Description” pane will appear. Un-select the “Leave as it” checkbox, add your Title, and select “OK”.
Color Contrast – Needs Manual Check
Every time you run the Accessibility Checker, your document will get flagged for Color Contrast. This is because Adobe has no way of knowing if your document has acceptable color contrast – you have to check for yourself! Thankfully, it is easy to do.
What is color contrast?
Color contrast refers to ensuring that the color of the text of a document has enough contrast with the background color for visual readers to easily read it. This helps users who have variations of color blindness, have low vision, or just need more contrast to read your content. Dark text on a light-colored background is almost always an excellent choice.
Great text color contrast combinations
- Black and White
- Purple and Yellow
- Navy and Light Grey
Bad text color contrast combinations
- Orange and White
- Green and White
- Red and Green
How do I check color contrast?
Since Adobe doesn’t have the capability of checking a document’s color contrast on its own, it is your responsibility to ensure that all your text can be easily read. If there is any text you feel might be an issue, there are online tools that can help ensure you have enough contrast.
Help! My text doesn’t have enough contrast! What should I do?
The Adobe PDF editor has built-in tools that allow you to change the color of the text in your document very quickly. This can help remediate many color contrast accessibility concerns. Unfortunately, this tool only allows you to change the color of recognized text.
Remember: Black text on a white background has the highest color contrast ratio.
- Select the “Edit PDF” tool. This can be found in the right tools panel, or under “Tools” in your top toolkit.
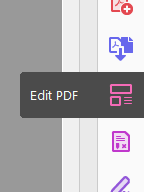
- Highlight the text that you want to change the color of. This should auto-populate the current text color in the editing toolkit.
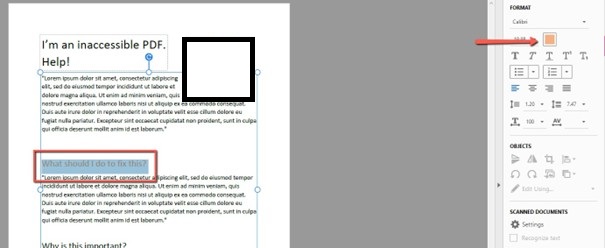
- Select the color pallet. This will open a color pallet for you to choose a new color.
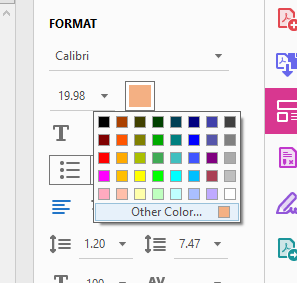
- Select your new color – ensuring that this color meets color contrast standards. This will automatically change the color of the text you have highlighted. You can always double-check using the color contrast checkers at WebAIM or Adobe. In this example, we changed the color of our text from light orange to black. We can be confident that this meets color contrast standards because we know that black text on a white background has the highest color contrast ratio available.
Alternative Text
Alternative text (sometimes called ‘alt-text’) is a text description of an image and is incredibly important for accessibility. Can you imagine trying to understand a document full of images and having no idea what the images are showing you? This is where alternative text comes to the rescue.
Figures Alternate Text – Failed
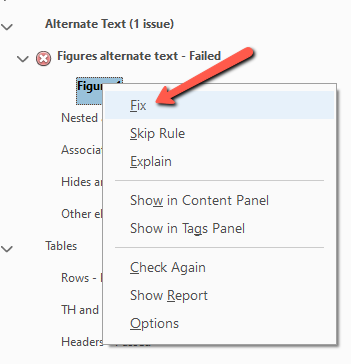
- Select the drop-down menu under “Figures alternative text – Failed”. This will show you all the figures in your document that do not have alternative text associated with it. This does not mean all the figures in your document have correct or helpful alternative text.
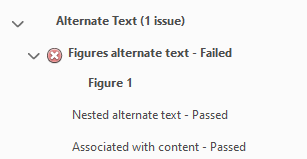
- Select the figure that doesn’t yet have alt text. This will highlight the image associated with the error, so you know what you are working with.
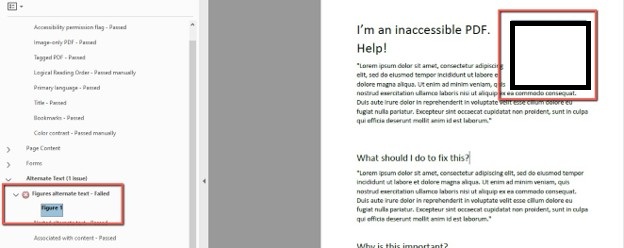
- Right-click the figure error and select “Fix”.
- The Set Alternative Text pane will open. Add your alternative text and select “Save and Close”.
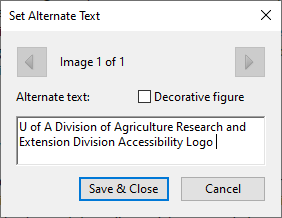
What is a “Decorative Figure”?
Decorative Figures are any image that is not directly related to the content being discussed. If an image is just used to fill white space or doesn’t contribute to a better understanding of what is being discussed, it can be considered “decorative” and does not need alternative text.
Tables
Headers – Failed
Header levels are incredibly important to include in tables. This allows screen reader users to navigate the table and fully understand its message.
- Under “Headers – Failed”, select the Element with an accessibility error. This action will highlight the table in your document that needs a summary added to it.
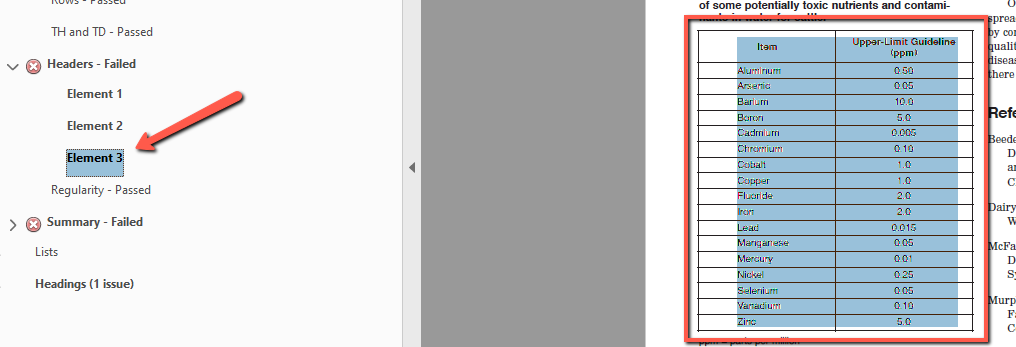
- Now that you know what table is missing a header, select the “Reading Order” tool on the right-side of your screen. Your reading Order tool pane will appear.
- Right-select the table you want to add header levels to and select “Table Editor”.
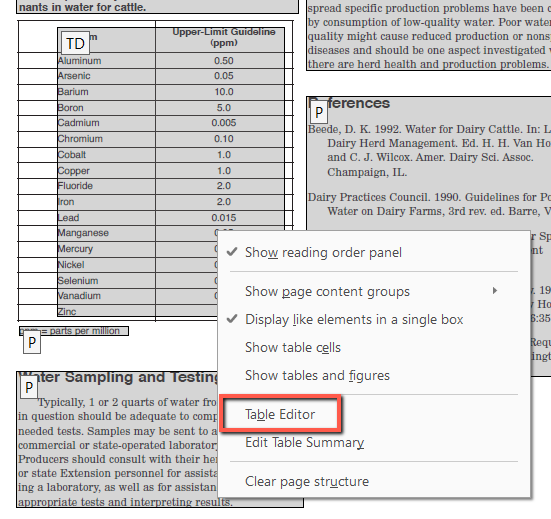
This will show you how every cell in your table is labeled.
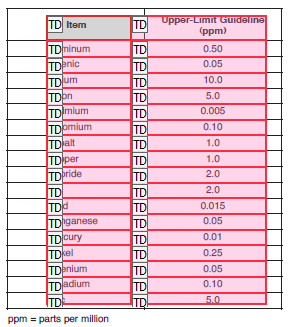
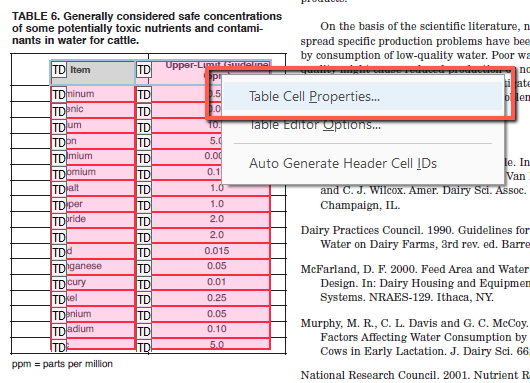
Note: “TD” stands for “Table Date” while “TH” stands for “Table Header”. - Select the cells you want to change from “Table Date (TD)” to “Table Header (TH)”. Right-click the highlighted cells and select “Table Cell Properties”.
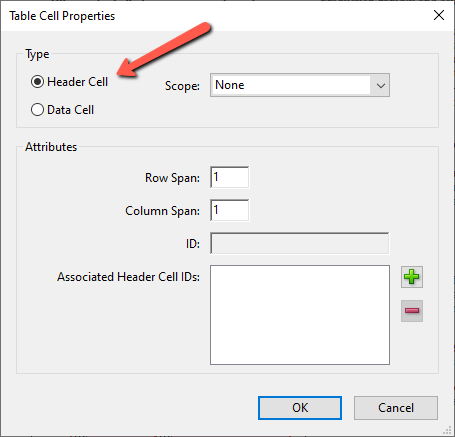
- The “Table Cell Properties” pane will open. Select “Header Cell”. This will re-tag your selected cells as header data instead of table data. Select “OK”.
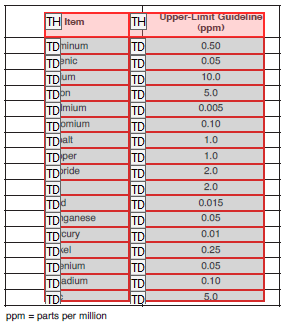
The resulting table will have newly tagged Header cells
Summary – Failed
Table summaries are typically two to three sentences that describe the overall understanding of your table. This helps screen reader users understand what the table is about before jumping into the data.
- Under “Summary – Failed”, select the Element with an accessibility error. This action will highlight the table in your document that needs a summary added to it.
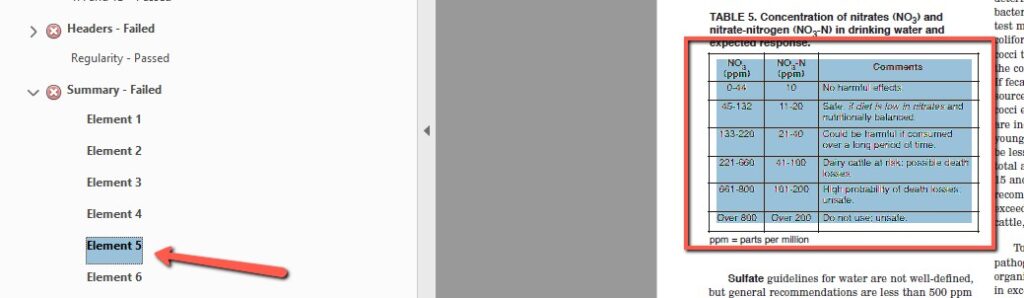
- Now that you know which table has the concern, select the “Reading Order” tool on the right-side of your screen. Your Reading Order tool pane will appear.
- Right-select the table you want to add a summary to and select “Edit Table Summary”.
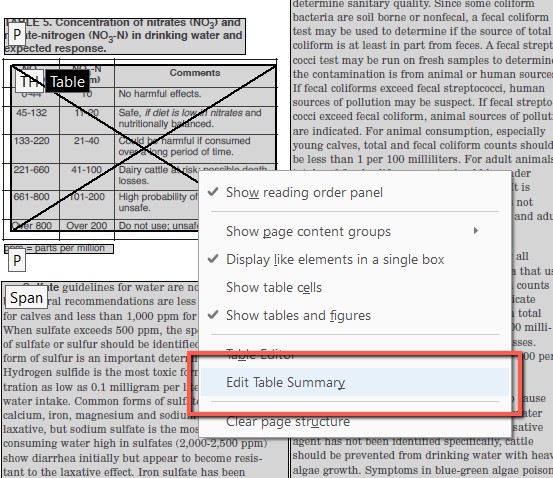
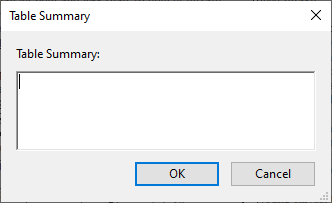
- The table summary pane will appear. Insert your table summary and select “OK”. Repeat for any other tables that need summary information.
Headings
Headings are used by screen reader users to move through content, better understand the structure of a document, and find the information they need. By adding correct headings to your document, you will ensure a better experience to all users.
Appropriate Nesting – Failed
Headers must be added in descending order. For example, a Header Level 2 may not precede a Header Level 1. Sometimes header levels get mixed up and become “inappropriately nested”. This simply means that a header level tag has been mixed up and will need to be tagged differently.
- Under the “Appropriate nesting – Failed” tag, select the Element that has an error. This will highlight the header tag that needs more attention.
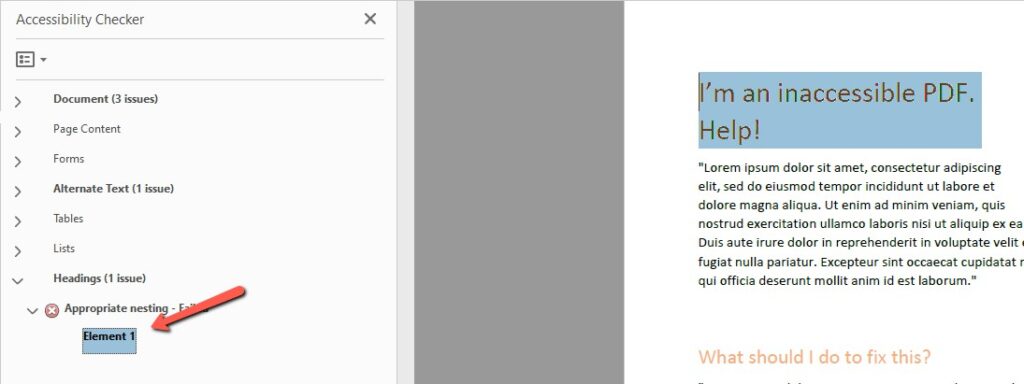
- Open the “Reading Order” tool in your Accessibility toolkit. This will allow you to see what header level your header is tagged as.
In this example, the header has a Header Level 2 tag when it needs a Header Level 1 tag.
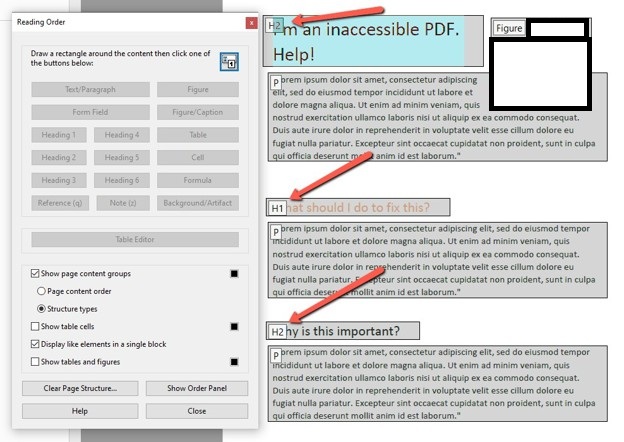
- Select the content you want to change the tag label as. This will highlight the tagged content.
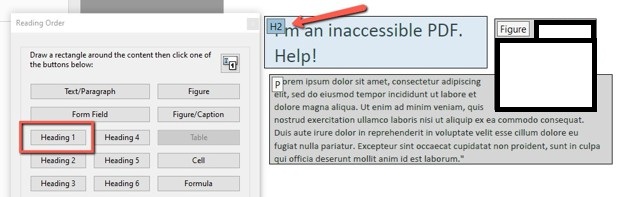
- In the open “Reading Order” pane, select the “Heading” you want re-tag this content with. This will immediately re-tag this content.
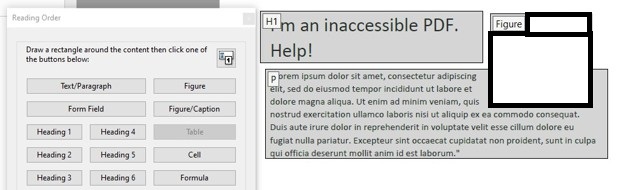
- Repeat as needed for any additional content.