PowerPoint Accessible Presentations
Table of Contents
- Introduction
- Task: Run the PowerPoint “Accessibility Checker”
- Tips for Creating Accessible PowerPoint Presentations
- Tip #1: Select an Accessible “Theme” for Your Presentation
- Tip #2: Adjust Slide Reading Order if Necessary
- Tip #3: Assure That Color Is Not the Only Means of Providing Information
- Tip #4: Use Descriptive Hyperlinks Instead of Pasting URLs
- Tip #5: Give Every Slide a Unique Title
- Tip #6: Assign Alt Text to Images
- Tip #7: Keep Tables Simple
- Tip #8: If You Create a Video, Use Captions
- Tip #1: Select an Accessible “Theme” for Your Presentation
- Suggested Resources
- Bibliography
Introduction
![]()
Microsoft Corporation, Public domain, via Wikimedia Commons
.svg)
When you use Microsoft PowerPoint to create visuals for your in-class and remote presentations, you should make a good-faith effort to address common formatting issues that can make your materials more accessible to students with disabilities.
Many of the same techniques for creating accessible documents that you would apply in MS Word can be used in PowerPoint; as with Word, PowerPoint has an Accessibility Checker that will identify accessibility issues. PowerPoint also provides access to a selection of pre-designed, accessible themes that can, when combined with observing a few additional tips, make formatting your presentations in an accessible manner easier.
Task: Run the PowerPoint “Accessibility Checker”
As with MS Word, run the PowerPoint “Accessibility Checker” by opening the “Review” tab in the ribbon and clicking, “Check Accessibility” (Figure 1).
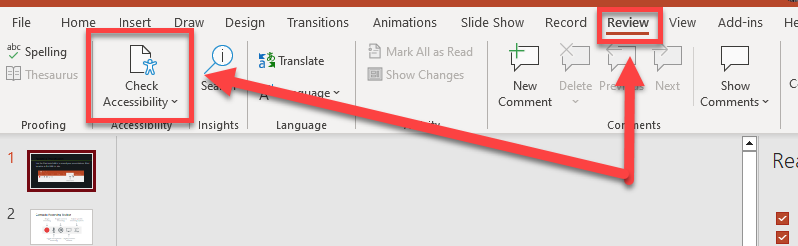
Figure 1: Running the “Accessibility Checker” from the “Review” tab in PowerPoint.
For a concise overview of how to use the “Accessibility Checker” in an Office document, watch:
Tips for creating accessible PowerPoint Presentations
The following tips are adapted from “Make your PowerPoint presentations accessible to people with disabilities” (Microsoft 365 support).
Tip #1: Select an accessible “Theme” for your presentation
When creating a new presentation, select a “Theme” that is relatively simple with a high degree of contrast between the text and background (Figure 2).
To select a “Theme” in in PowerPoint:
- Open the “Design” tab from the Ribbon.
- Select a Theme from the “Themes” area.

Figure 2: Selecting a PowerPoint “Theme” from the “Design” tab on the ribbon.
The best “themes” are basic designs that incorporate either black text over a white background or white text over a black background.
You can also search for accessible PowerPoint “Themes” when creating a new PowerPoint file:
- Select “File” > “New”
- In the “Search for Online Templates” and themes Text field, type “accessible templates” and press Enter.
- In the search results, select a suitable template.
- In the template preview, select Create (Microsoft Corporation, 2022).
For more information, watch:
- Microsoft Support – Use more accessible colors and styles in slides (2:17)
Tip #2: Adjust your slides “reading order” when necessary
Open the “Reading Order” pane from the “Check Accessibility” menu to adjust the “reading order” of elements on each slide (this is the order in which a screen reader application would read the elements on the slide) (Figure 3).
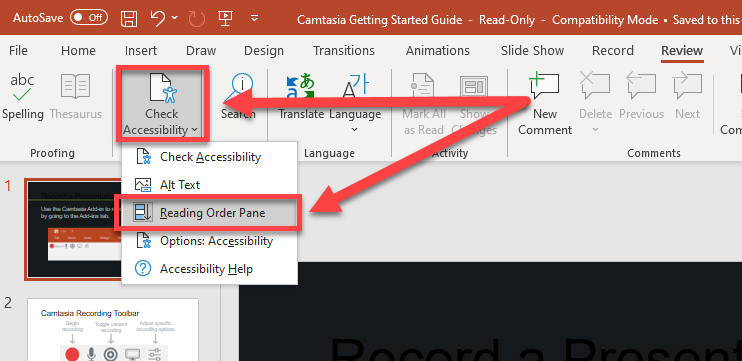
Figure 3: Opening the “Reading Order Pane” from the “Check Accessibility” menu in the “Review” tab.
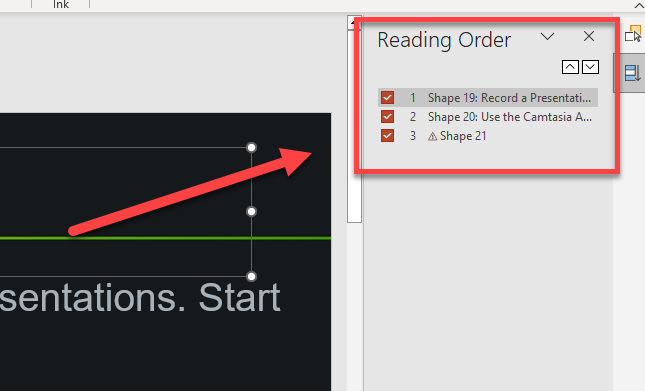
Figure 4: Use the “Reading Order” pane to adjust the reading order of elements on your slides if needed.
Note: Using pre-designed slide layouts available through an accessible PowerPoint “Theme” should address most “reading order” accessibility issues (Figure 5).
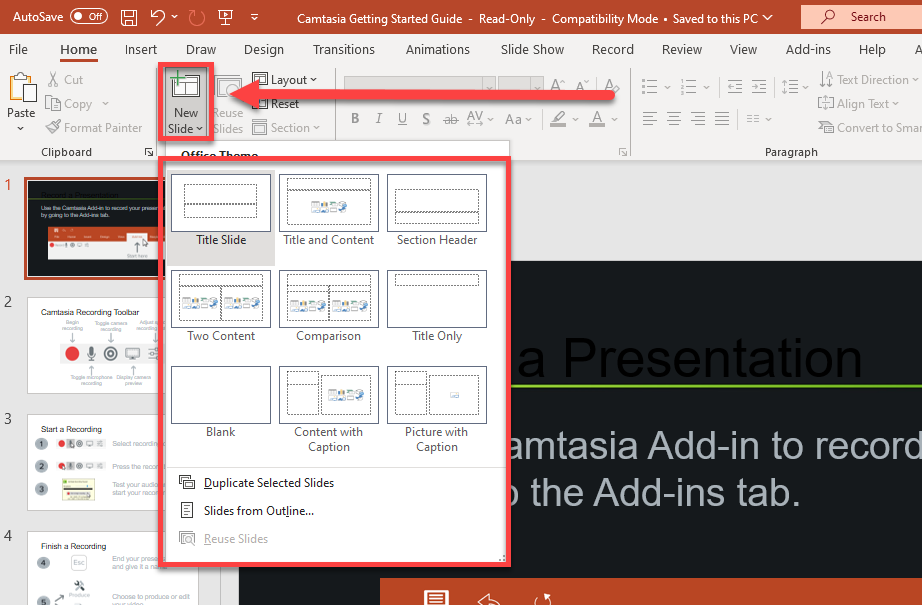
Figure 5: Using pre-designed slide layouts from the “New Slide” menu can address most “reading order” accessibility issues.
For a concise overview of how to address the “Reading Order” of elements on a slide in an accessible manner, watch:
Tip #3: Assure that color is not the only means of providing information on your slides
Your slides should convey the same meaning regardless of the ability of your students to perceive color-normally.
You can evaluate your slides by turning on the “Color Filters” feature under “Settings” in Windows 10; this will render everything on your screen in greyscale (Figure 6).
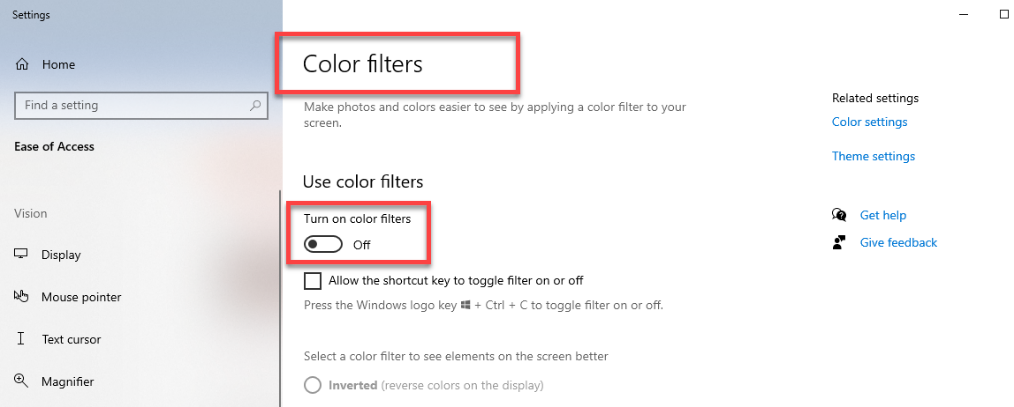
Figure 6: The “Color filters” setting in Windows 10.
Tip #4: Use descriptive hyperlinks instead of “pasting” URL’s in your slides
Avoid “pasting” URL into your presentation when posting hyperlinks to outside Web sites, e.g.:
Instead, create “descriptive” hyperlinks where the text displayed to your students in the link tells them something about the target Web site, e.g.:
From the ribbon, open the “Insert” menu and use the “Link” tool to insert a properly formatted hyperlink (Figure 7):
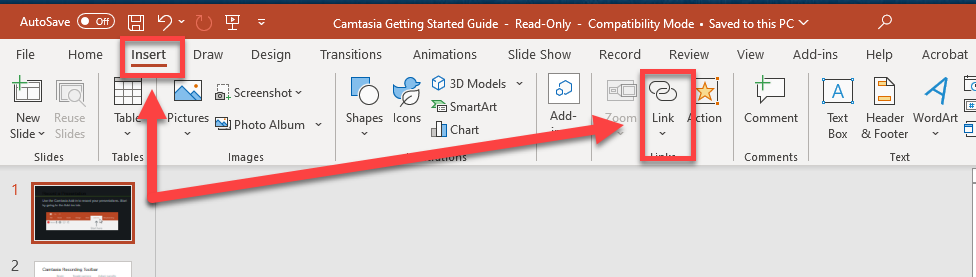
Figure 7: Opening the “Link” tool from the “Insert” tab on the ribbon.
For an overview of how to add descriptive hyperlinks in MS Office documents, watch:
- Microsoft 365 Support – “Create Accessible Links in Word” (2:09)
Tip #5: Give every slide a unique title
The “Title” property of PowerPoint slides is recognized as such by screen-reader applications.
There are many ways to add a “Title” to a slide in PowerPoint. Most of the pre-designed slide layouts included in a PowerPoint Theme will feature a text box that serves as the “Title” of the slide. You can also view all slide “Titles” by opening the “View” panel in the ribbon and selecting, “Outline View” (Figure 8).
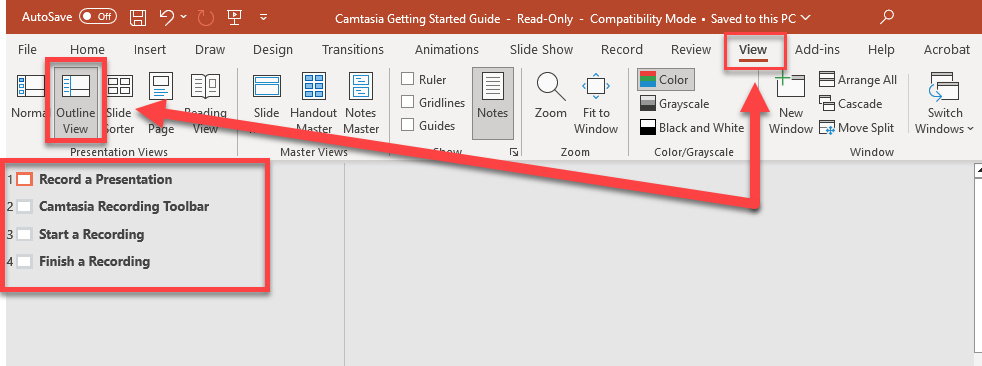
Figure 8: Opening the “Outline View” tool from the “View” tab on the ribbon.
For more information on how to add “Titles” to PowerPoint slides, read:
- Microsoft 365 Support – Title a slide
Tip #6: Assign “Alt-text” to images
Per Microsoft support:
“Alt Text helps people with visual impairments understand pictures and other graphical content. When someone uses a screen reader to view documents, they will hear Alt Text; without Alt Text, they will only know they’ve reached a picture without knowing what the picture shows. (Microsoft Corporation, 2022).”
For a concise overview of how to add “Alt-text” to images in PowerPoint and improve accessibility of images in other ways, watch:
For information on how to write Alt-text effectively, read:
Tip #7: Keep tables simple.
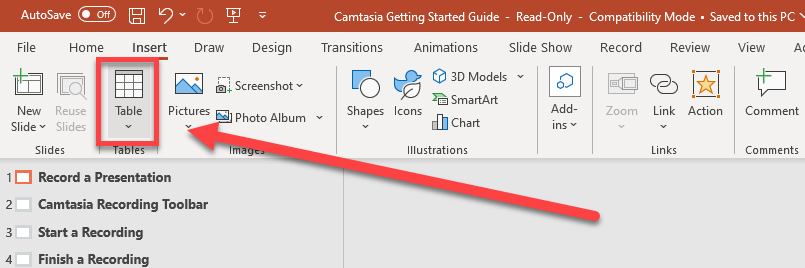
Figure 9: The “Insert > Tables” tool.
Avoid using tables if your information can be conveyed just as effectively by some other means such as lists or paragraph headings. If you use tables, keep them simple and data oriented.
For a concise description of how to use Tables in an accessible manner, watch:
Tip #8: If you create a video, use captions.
If you decide to create video using PowerPoint and post it in your course, make sure that you are using available tools for creating and editing captions and making them available to students.
For a concise summary of how to create a video using PowerPoint, watch:
At FDU, videos can be posted in online classes in several ways:
- By creating a channel in “Kaltura Mediaspace”.
- Recording a lecture using “Echo 360”.
- Sharing a meeting recording through the Zoom portal.
Note: Due to storage constraints, uploading video files directly to WebCampus is not recommended.
For training on Kaltura Mediaspace, Echo360, or Zoom including how to edit captions for video hosted using those systems, contact FDUTAC and fdutac@fdu.edu.
Suggested Resources
Accessibility Video Training
- Create Accessible PowerPoint Presentations
- Improve accessibility with the Accessibility Checker
- Make slides easier to read by using the Reading Order pane
- Get Accessible Templates for Office
Bibliography
Microsoft Corporation. (2022, 12 21). Make your PowerPoint presentations accessible to people with disabilities. Retrieved from Microsoft 365 support: https://support.microsoft.com/en-us/office/make-your-powerpoint-presentations-accessible-to-people-with-disabilities-6f7772b2-2f33-4bd2-8ca7-dae3b2b3ef25#bkmk_templatewin
This resource was developed by the Office of Educational Resources and Assessment.