Tables
Tables for data vs tables for layout
In HTML, the table feature in the editor is included to allow you to create small tables for your web page. A proper, accessible table has a title at the top of each column that labels the content below. Every cell in the first row must have a title, including the first cell. This is called the header row. Often, the first cell in each row is also a title for the row. These titles need to be specially formatted. If you need a table in your web page, please contact Web Operations for assistance.
A layout table is a table that does not contain relationships between the column heading and the row heading. Instead, the table feature that is used simply lays out a page in a particular manner. This is a technique is largely non-accessible and usually not mobile-friendly. The vast majority of layout tables should be created as accessible web pages instead.
For assistance with tables, contact Web Operations.
TablePress
Use the TablePress plug-in to work with larger data tables. The instructions below are intended for Web Editors with advanced skills who are comfortable with using Text mode in the editor, which allows you to edit the page’s code directly. If you need assistance with making a TablePress table, please contact Web Operations.
Here is an example of a large table made using TablePress. This table has too many columns to fit neatly within the page boundaries, so it has a horizontal scrollbar along the bottom. The instructions below describe how to make a table like this.
| Column A | Column B | Column C | Column D | Column E | Column F | Column G | Column H | Column I | Column J |
|---|---|---|---|---|---|---|---|---|---|
| Sample data | Sample data | Sample data | Sample data | Sample data | Sample data | Sample data | Sample data | Sample data | Sample data |
| Sample data | Sample data | Sample data | Sample data | Sample data | Sample data | Sample data | Sample data | Sample data | Sample data |
| Sample data | Sample data | Sample data | Sample data | Sample data | Sample data | Sample data | Sample data | Sample data | Sample data |
| Sample data | Sample data | Sample data | Sample data | Sample data | Sample data | Sample data | Sample data | Sample data | Sample data |
| Sample data | Sample data | Sample data | Sample data | Sample data | Sample data | Sample data | Sample data | Sample data | Sample data |
Step 1: Load data into TablePress
If your data is available in an Excel spreadsheet:
- Save the sheet as a CSV
- In TablePress, click Import / Import a Table
- Upload the CSV to create your table. Make sure to review it for errors after the import process.
If your data is not in an Excel spreadsheet:
- Made a new table and enter the data by hand
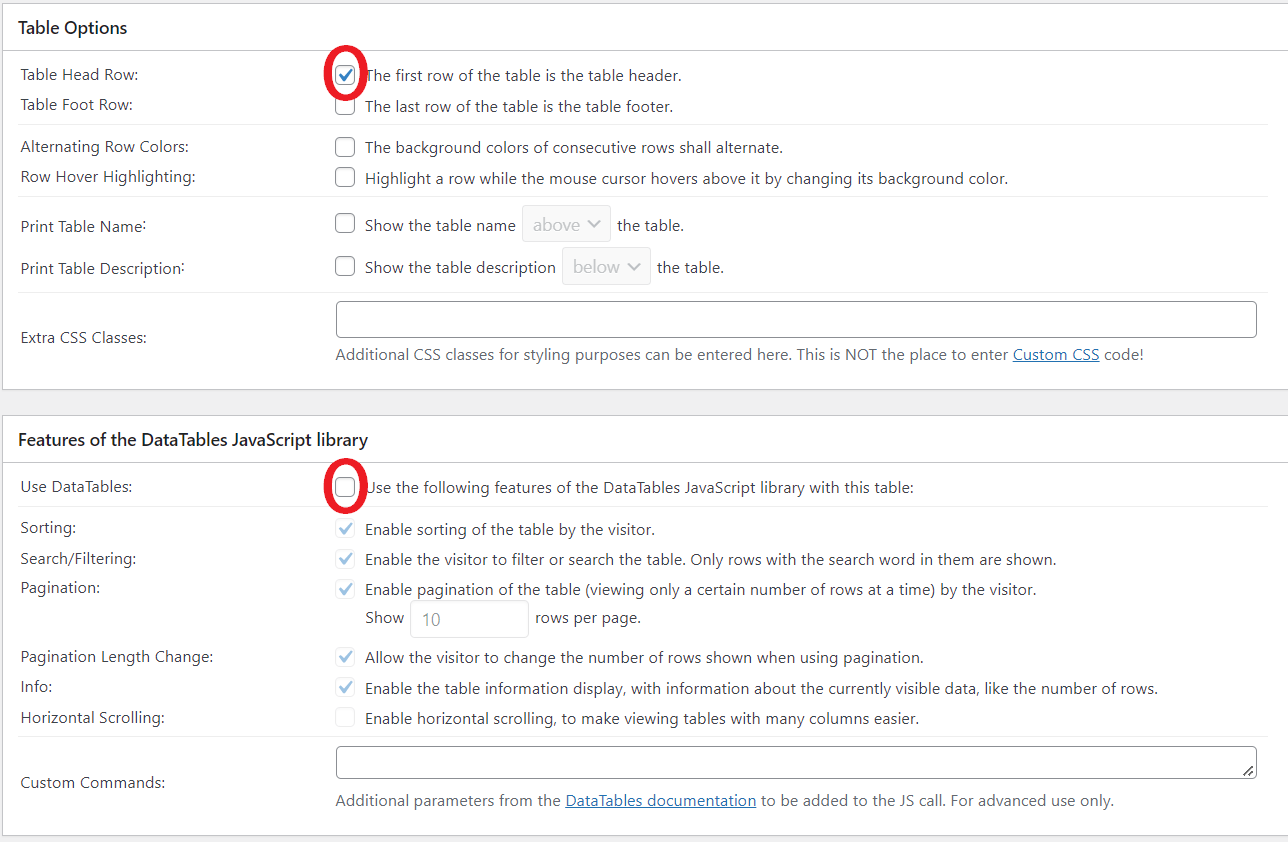
- Once you have some data entered into TablePress, check and uncheck the options to match the below screenshot
 Save the table with an appropriate name and description
Step 2: Put the table on a page
Using the Body Copy component, go the HTML view and paste in the table shortcode (provided at the top of the TablePress edit screen for that table)
Save the page.
Step 3: Check your table
View the table on the page and resize your browser window to see how it looks at all screen sizes, down to 360px wide. If at any point the table gets cut off on the right hand side, you need to add a div wrapper as described below. Tables with 3 or fewer columns will probably be fine as-is.
Table Troubleshooting / Advanced Configuration
If your table has many columns and needs to scroll horizontally:
In the WYSIWYG editor of the Body Copy component, click the Text tab to switch to code view
Wrap the table in a div with the class “tablepress-scroll-wrapper” as in this screenshot:

Save the page and check the table again to make sure it scrolls horizontally now.
If you need to make columns in your table wider:
Hover over Tablepress in the lefthand sidebar and click Plugin Options.
In the Frontend Options and Styling section, click into the Custom CSS box
Locate the code example pictured below in the box.
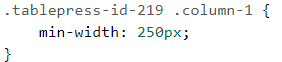
Copy/paste it to make a copy of it, and then do the following steps on your copy:
- Replace the number after “id-“ with the ID of your table.
- Replace the number after “column-“ with the column of your table that you want to resize.
- Change the min-width as desired.
- Make sure these changes are NOT overwriting the original code snippet.
- Click save changes
On the next screen, you will be prompted to enter FTP information. Scroll down instead, and click the button labeled “Proceed without saving Custom CSS to a file.”
Check your table to see if you are happy with the changes.